Active Directory Project

Project Goal
To design and implement a basic Active Directory environment that integrates Splunk, Slack, and Shuffle to automate responsive security actions in real time.
Part 1: Architecture Design
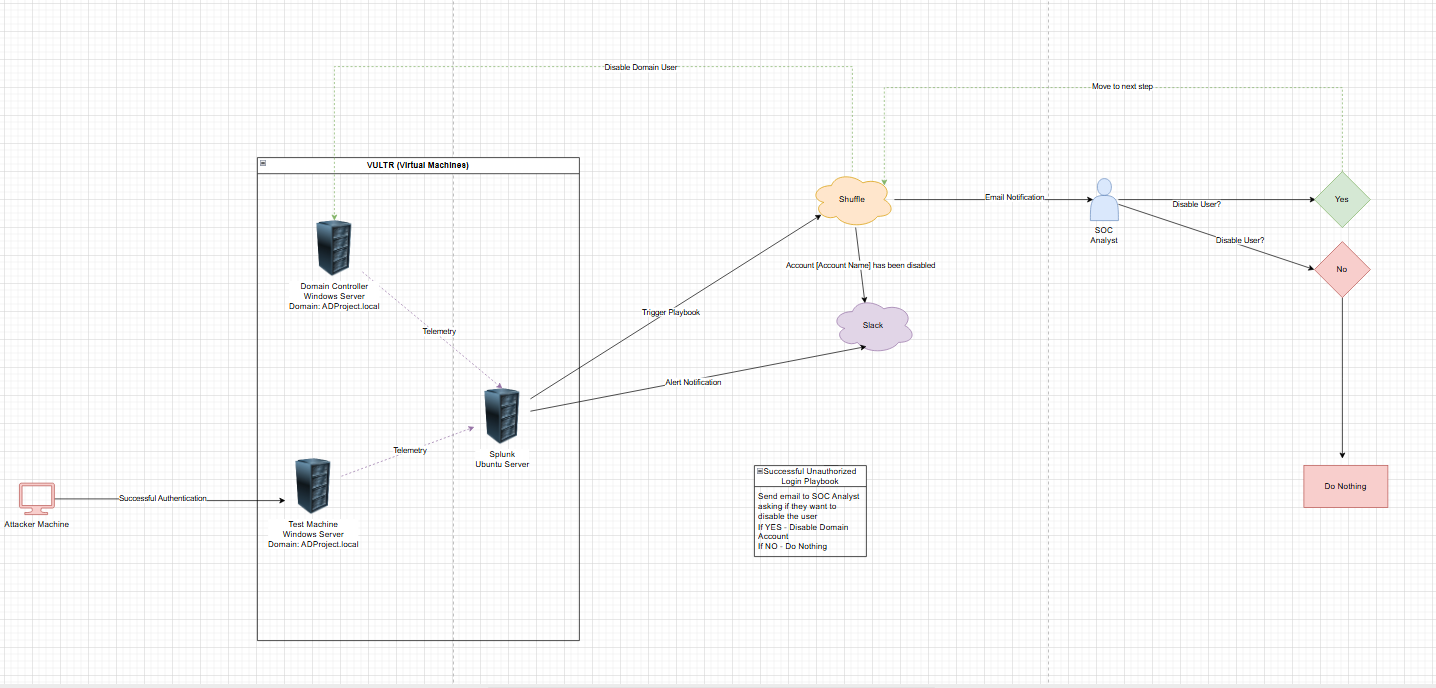
I created a logical diagram using draw.io to map out the environment and workflow. The setup included three Virtual Machines:
- Ubuntu Server – Runs Splunk for log aggregation and alerting.
- Windows Server – Acts as a domain controller.
- Windows Test Machine – Simulates a user endpoint within the domain.
Additional Machine:
Attacker VM – Simulates an adversary authenticating to the test machine.
Workflow Overview
- The attacker successfully authenticates to the test machine.
- The test machine and domain controller send telemetry to Splunk.
- Splunk detects the suspicious activity and generates an alert.
- Splunk:
- Triggers a webhook to Shuffle, launching an automation playbook.
- Shuffle Playbook:
- Sends notification to Slack.
- Sends an email to a SOC Analyst asking whether to disable the user.
- If “Yes”, the domain account is disabled via the domain controller.
- If “No”, no action is taken.
- Upon account disablement, Shuffle sends a Slack notification confirming the account has been disabled.
Tools Used
- Splunk – SIEM/log aggregation and alerting
- Slack – Notifications for security events
- Shuffle – SOAR (Security Orchestration, Automation, and Response) platform
- Active Directory – Centralized user management
- draw.io – Architecture diagram creation
Part 2: Setting Up My Virtual Machines
To build out my lab environment, I used Vultr as my cloud provider and provisioned three virtual machines based on the architecture from Part 1:
Splunk Server – Ubuntu-based VM used for collecting and analyzing logs
Test Machine – Windows-based VM simulating a user workstation
Domain Controller – Windows Server configured to manage the domain
Network Security
To secure my environment, I created a firewall group that applied to all three VMs. This firewall group was configured to only allow inbound SSH and RDP connections from my personal IP address, reducing external exposure.
Internal Networking
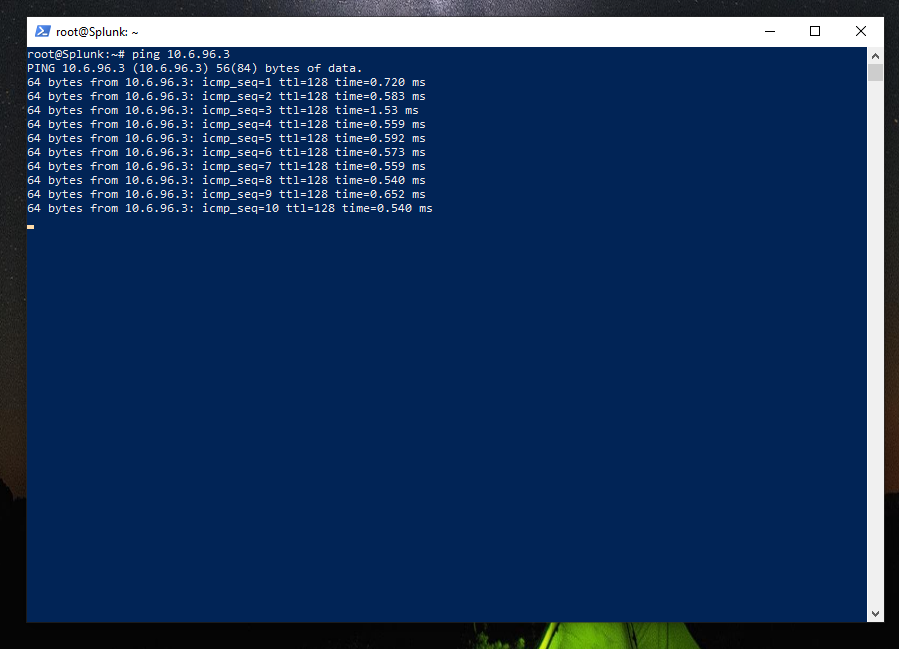
To ensure internal communication between VMs, I enabled a Virtual Private Cloud (VPC) on all machines so they could communicate over a private internal network.
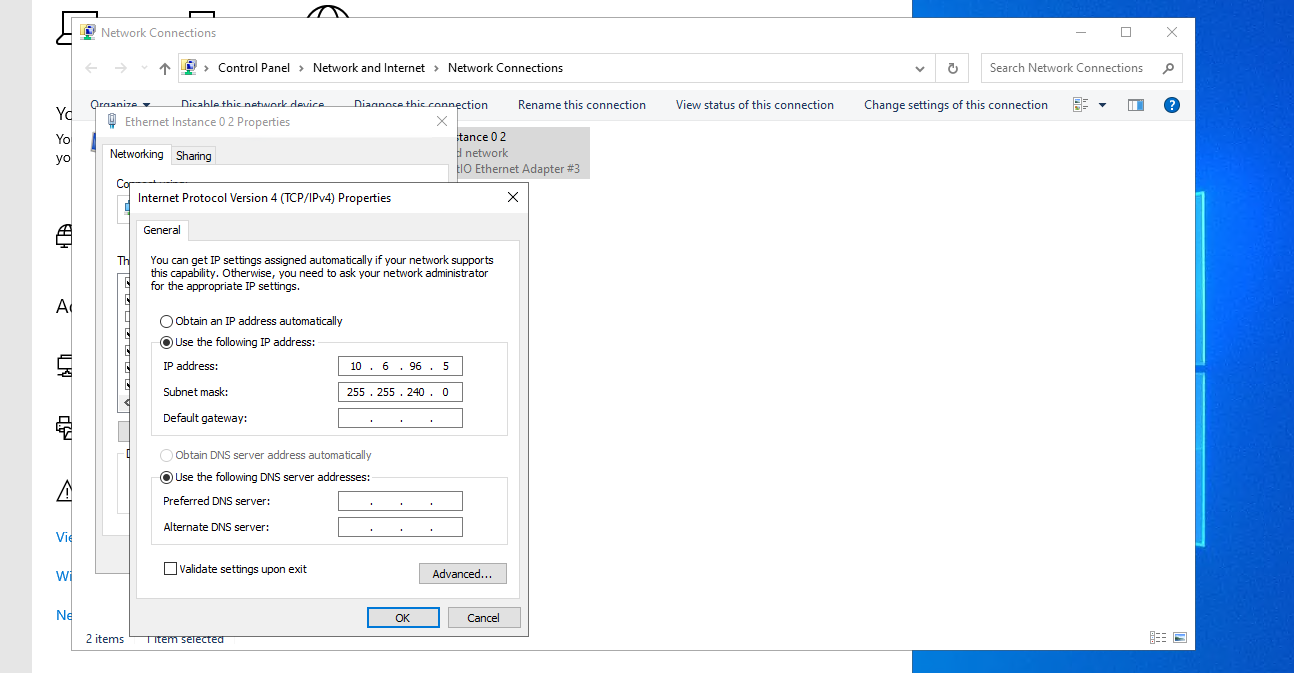
After enabling VPCs, I tested internal connectivity by pinging each VM from the Splunk server. I encountered an issue where the VMs couldn’t communicate after enabling the VPCs.
I resolved this by updating the internal IP addresses on the Test Machine and Domain Controller to ensure they matched the VPC network configuration.
Part 3: Setup Active Directory
In this phase, I installed and configured Active Directory on my Windows Server and promoted it to function as a Domain Controller.
Steps Completed
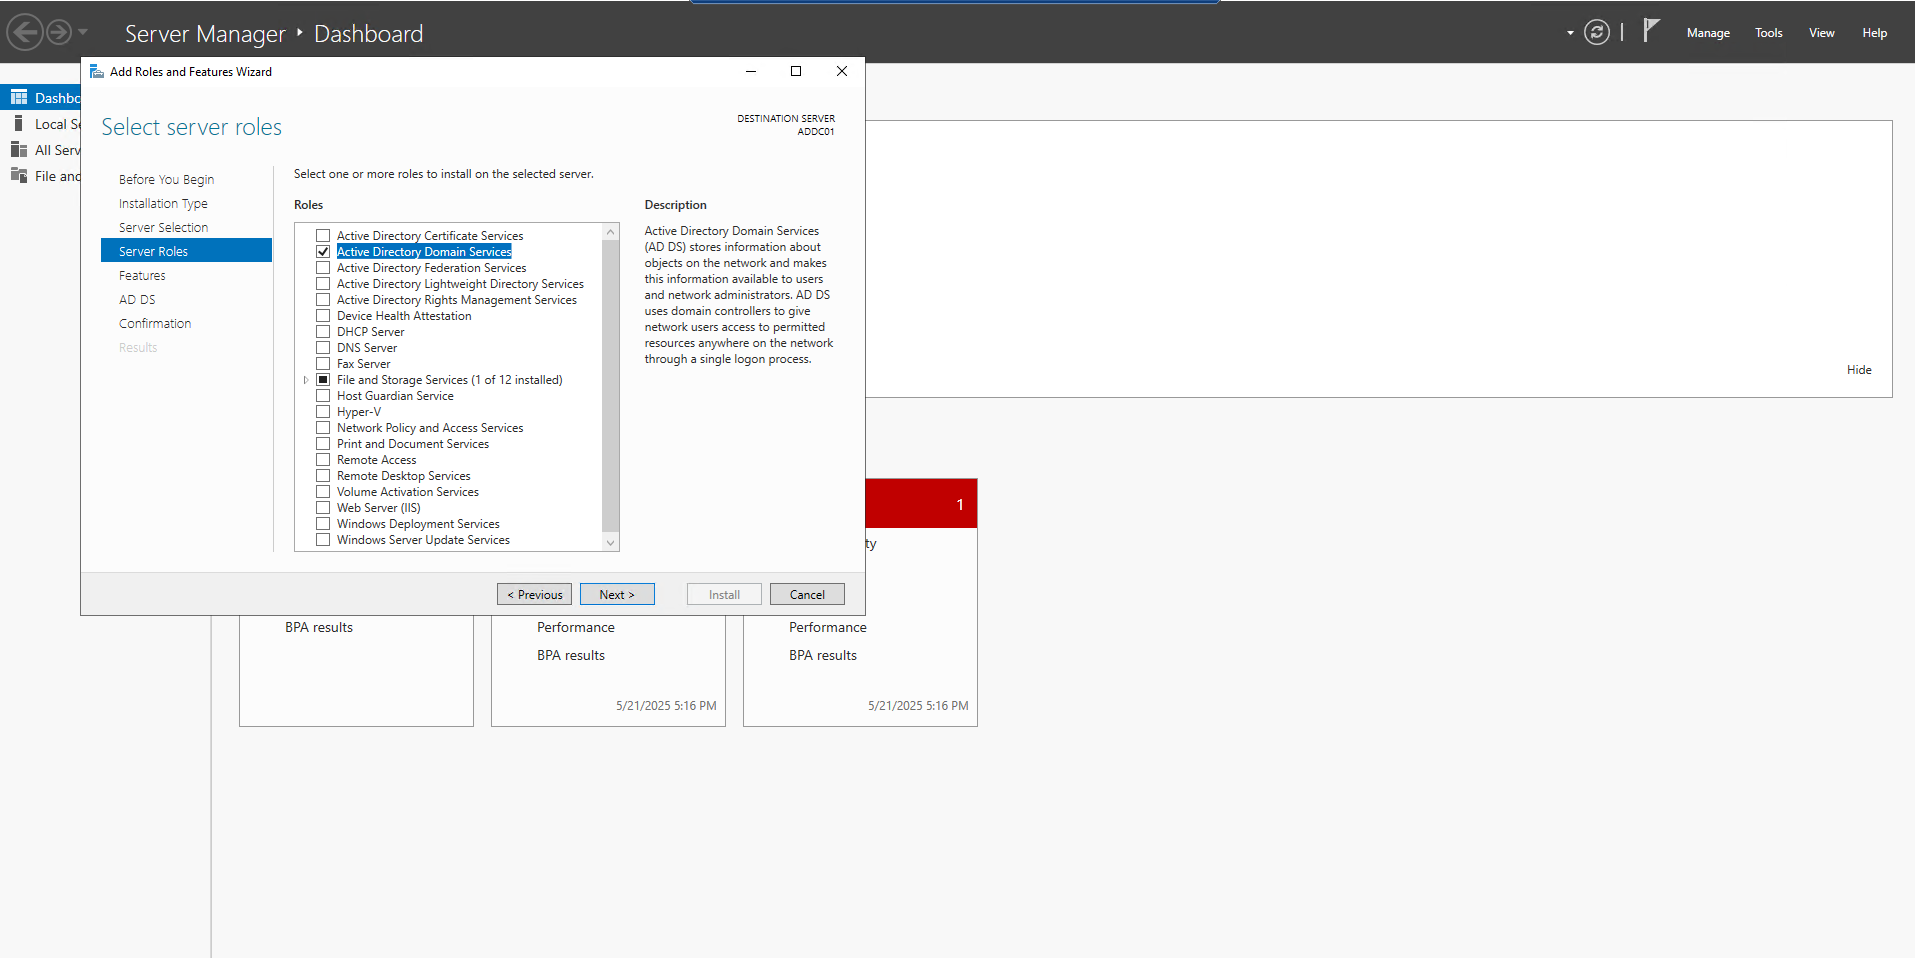
1. Installed Active Directory Domain Services (AD DS) on the Windows Server.
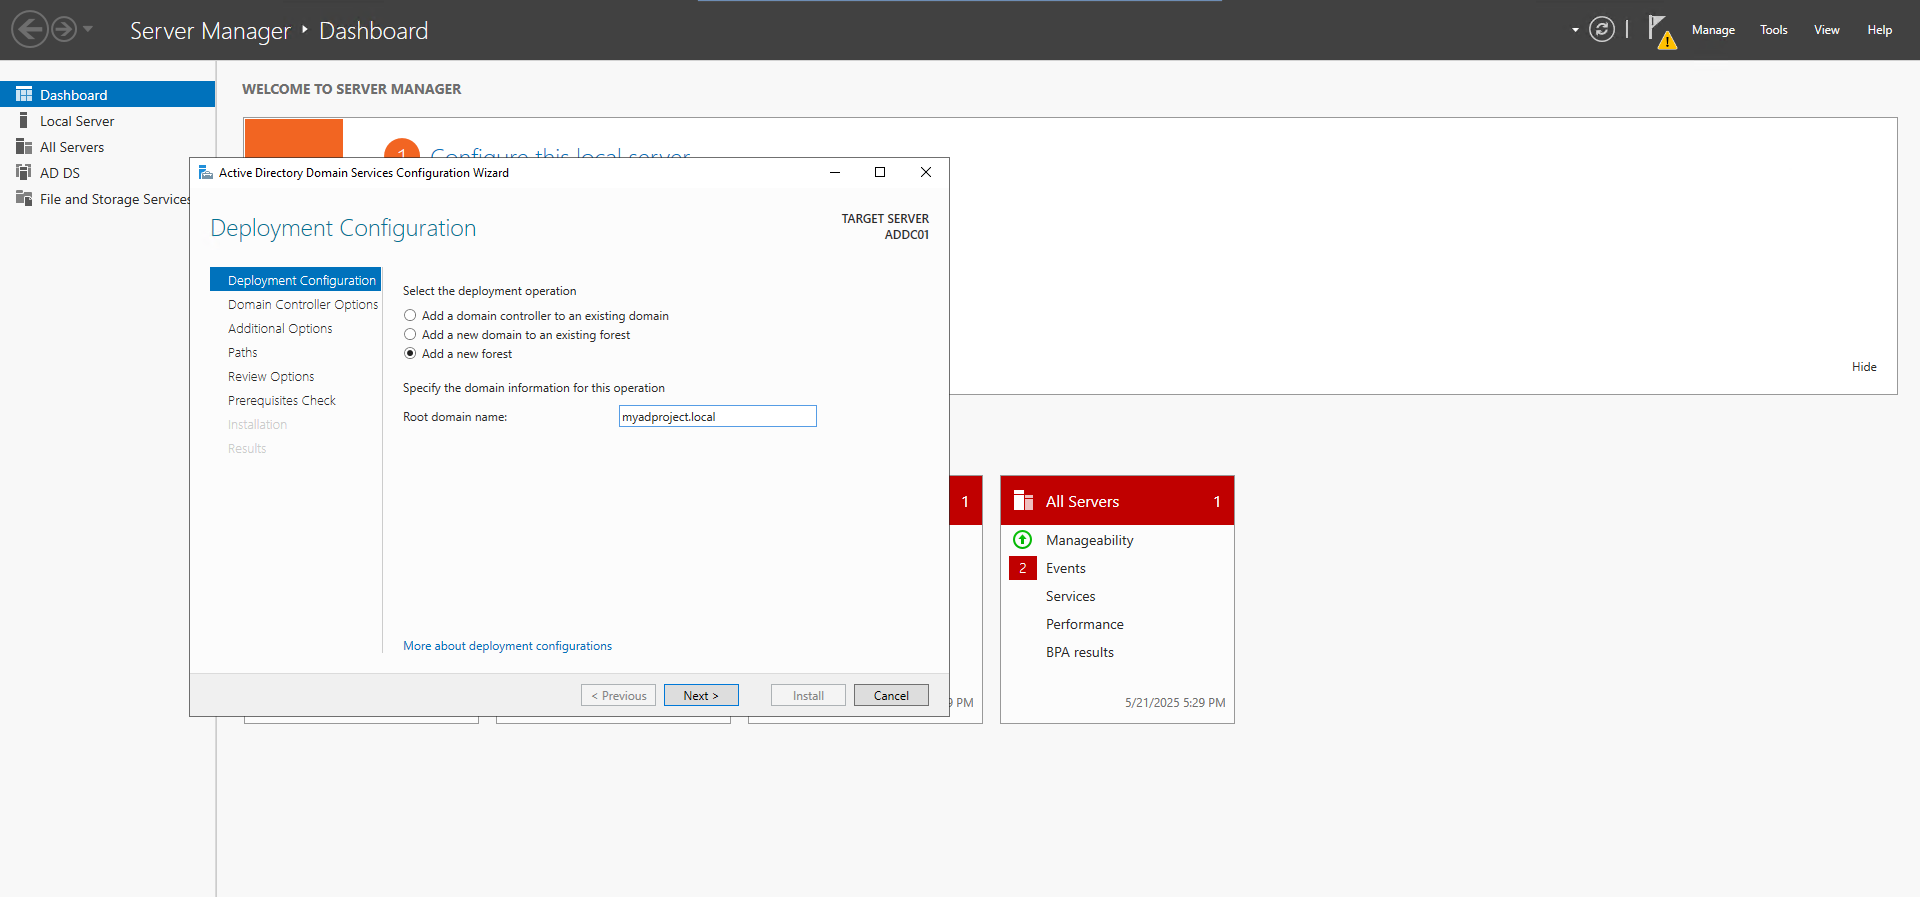
2. Promoted the server to a Domain Controller, establishing the domain: myadproject.local
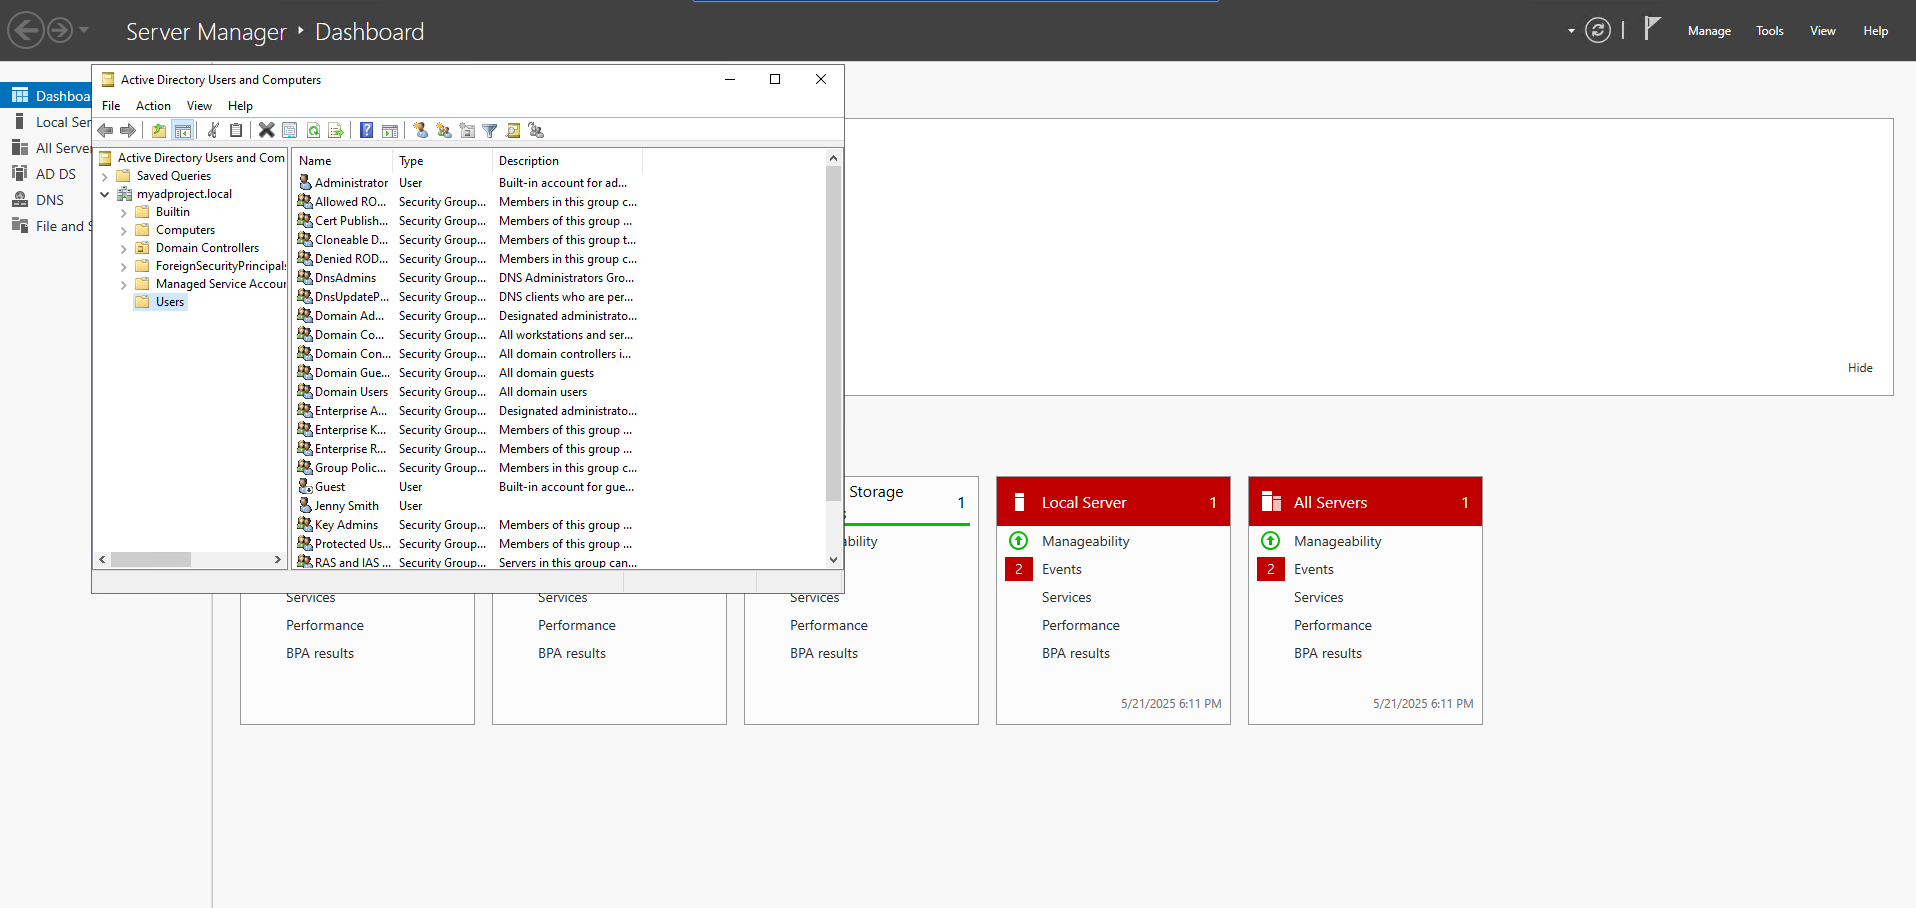
3. Created a new user account in Active Directory: Test Smith
4. Configured the Windows Test Machine to join the domain, enabling centralized authentication and policy management.
By successfully joining the test machine to the domain and managing user accounts through the Domain Controller, I laid the foundation for simulating domain-based authentication and implementing automated response actions in future steps.
Part 4: Install and Configure Splunk
Installation
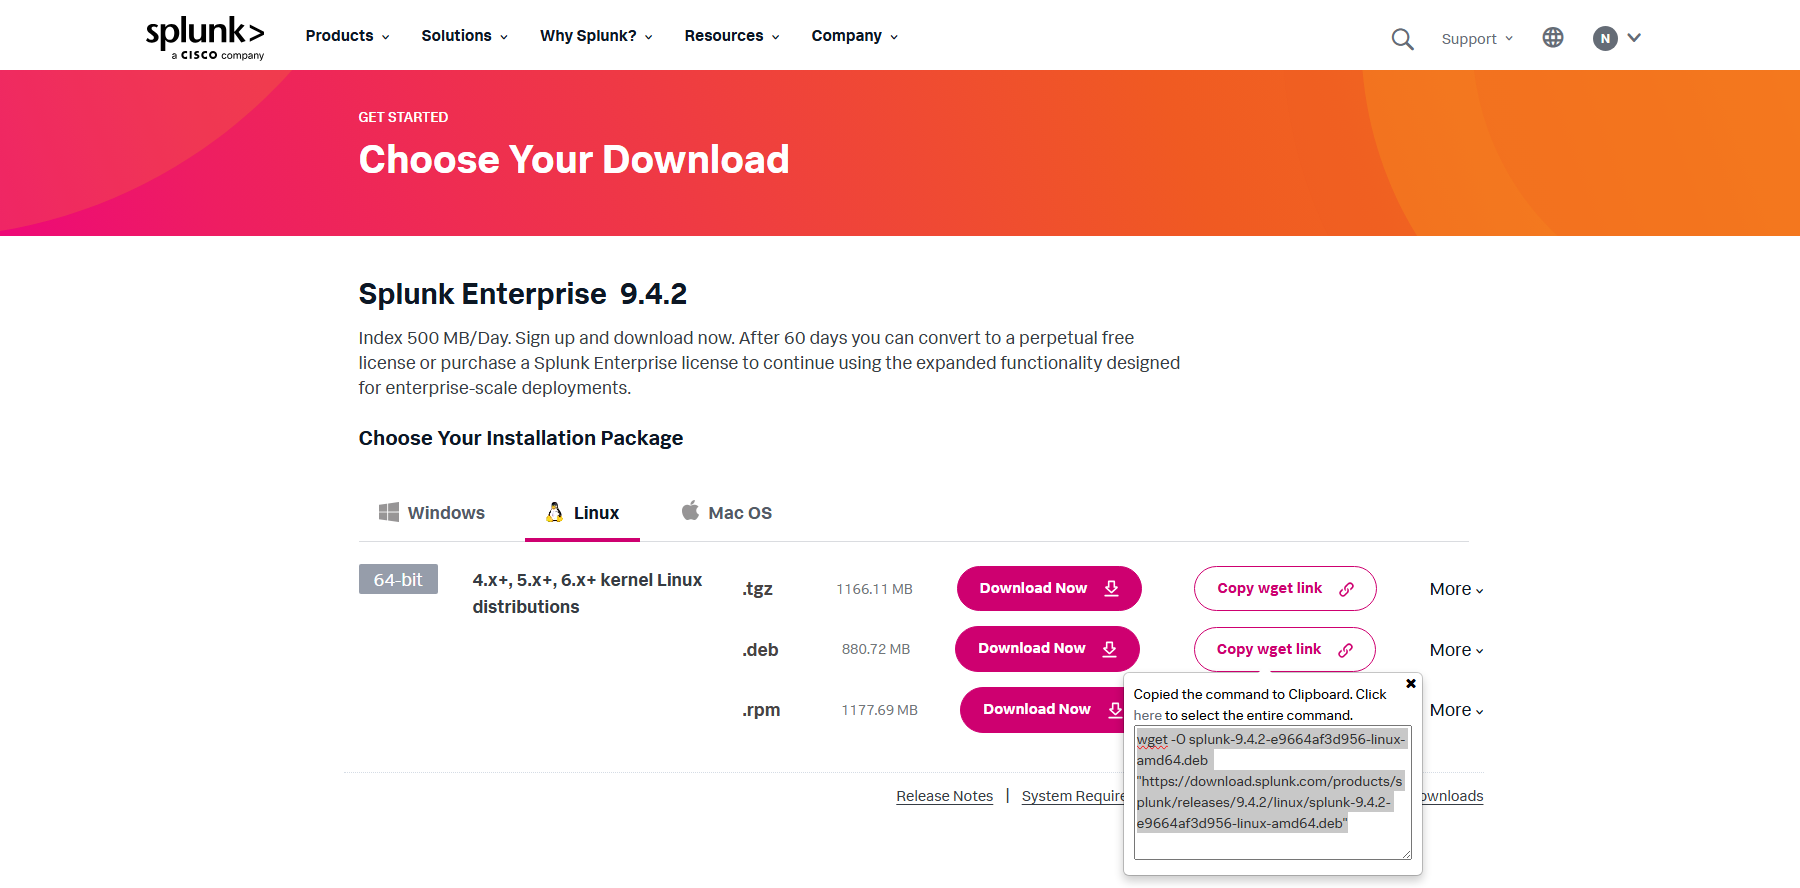
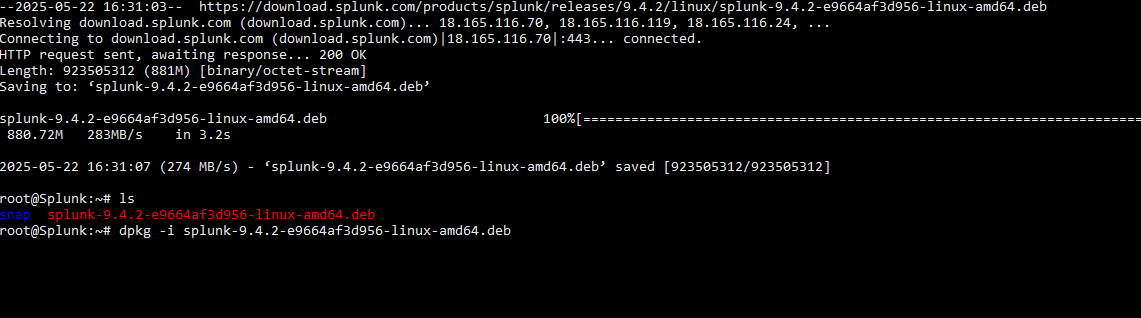
Logged into the Splunk server via SSH, navigated to splunk.com, created an account, and obtained the wget command to download the installation package directly to the server. After that, I ran the command to install Splunk on the Ubuntu machine.
To access the Splunk web interface, I updated my firewall rules to allow inbound connections on port 8000, which is Splunk’s default web port.
root@Splunk:/opt/splunk/bin# ufw allow 8000/tcpI did run into an issue where I was able to access the login screen, but every time my credentials were entered I received a server error. After a lot of trial and error, I found that I needed to add the code below to the web.conf file.
[settings]
enableSplunkWebSSL = true
After accessing the dashboard, I added the app “Splunk Add-on for Windows” for data collection on Windows machines. I also added an index and made sure Splunk was listening on port 9997.
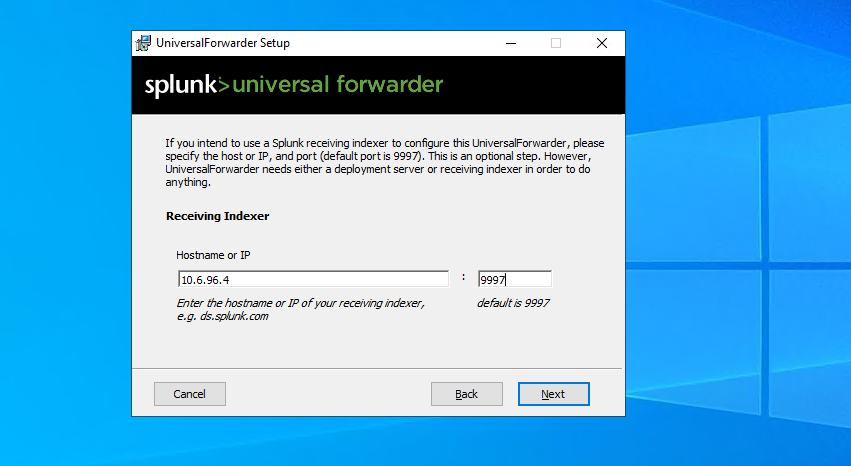
Installing Splunk Universal Forwarder
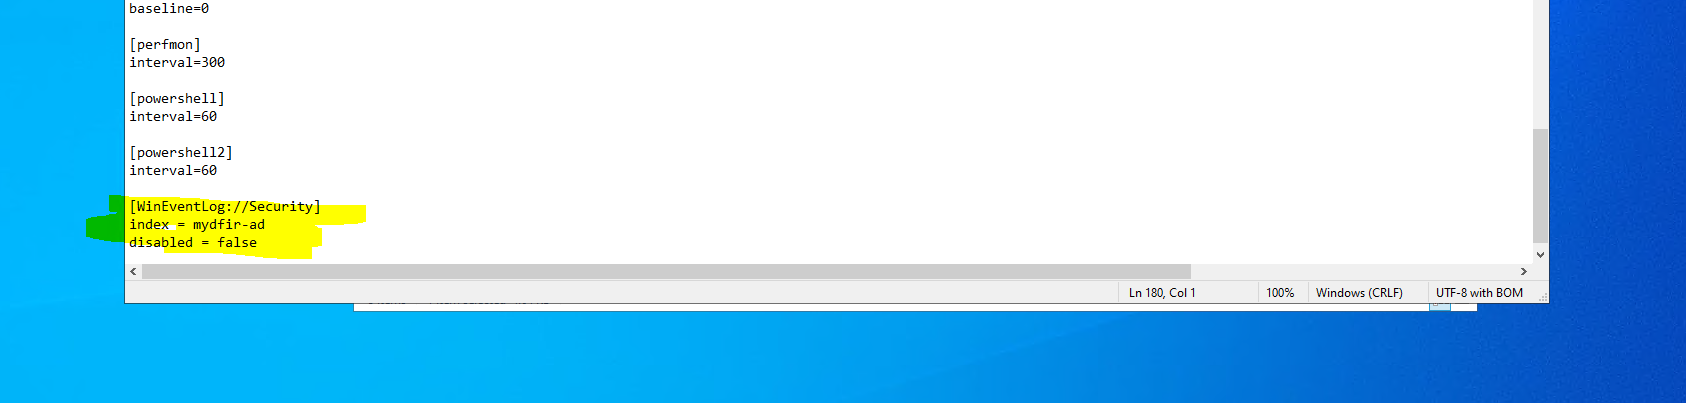
After the initial setup, I downloaded and installed the Splunk Universal Forwarder on the Windows test machine first. I needed to add some information to the inputs.conf file.
I then followed these same steps and installed the forwarder on the domain controller machine.
Send Data from Windows Machine
I needed to enable port 9997 on the Splunk machine first. After that, I checked the Splunk dashboard to make sure I was getting information.
root@Splunk:/opt/splunk/bin# ufw allow 9997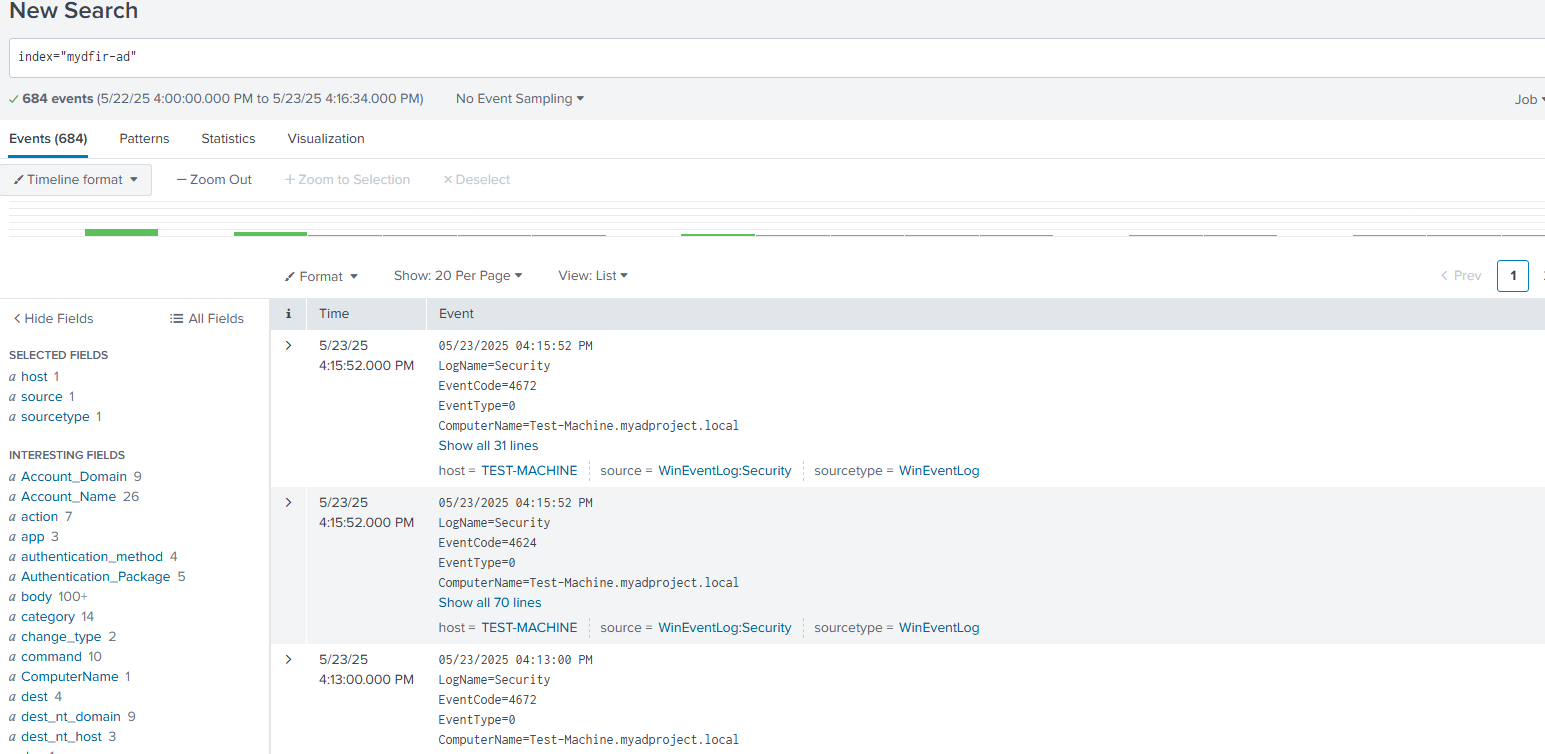
Create Splunk Alert
To simulate suspicious activity and generate telemetry, I temporarily removed the firewall rule that restricted RDP access to just my IP. Then, using a VPN, I connected to the test machine basically pretending to be an attacker.
For alerting, I created a search in Splunk that looked for any RDP connections not coming from my own IP address. I saved it as a scheduled search, and whenever that kind of connection happened, Splunk would fire off an alert.


Part 5: Slack & Shuffle Automation
With alerts working in Splunk, I moved on to building out the response automation using Shuffle and Slack.
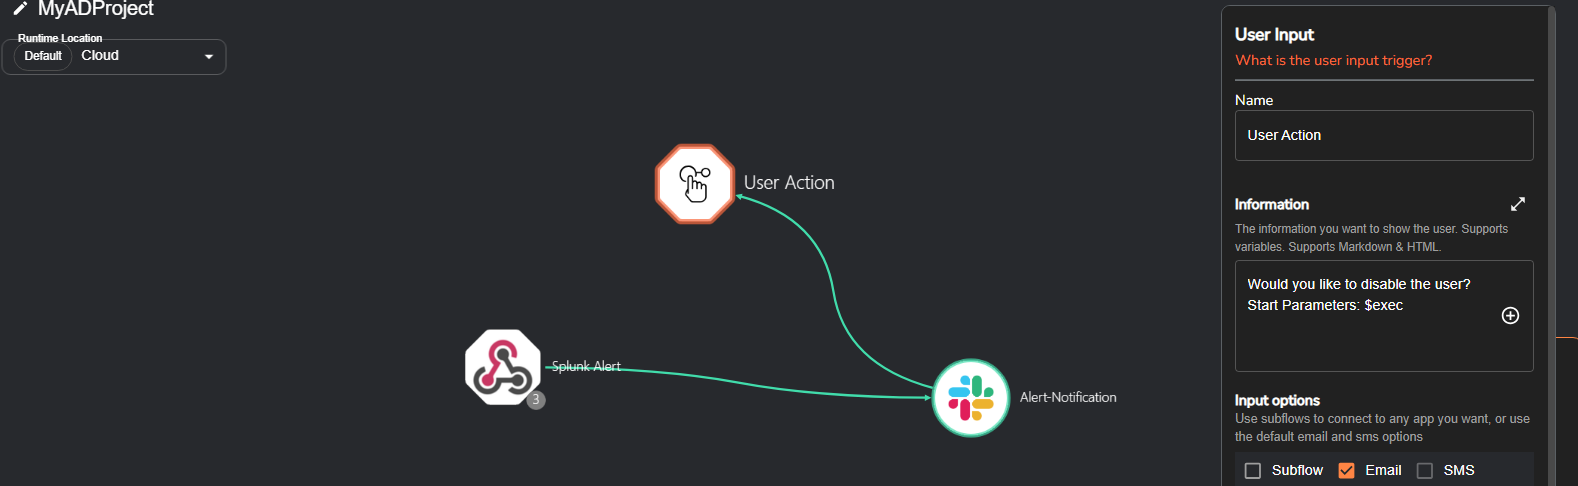
I started by creating a workflow in Shuffle that begins with a webhook trigger—this webhook URL was added directly into the alert configuration in my Splunk dashboard. Once an alert is triggered, the webhook kicks off the Shuffle playbook.
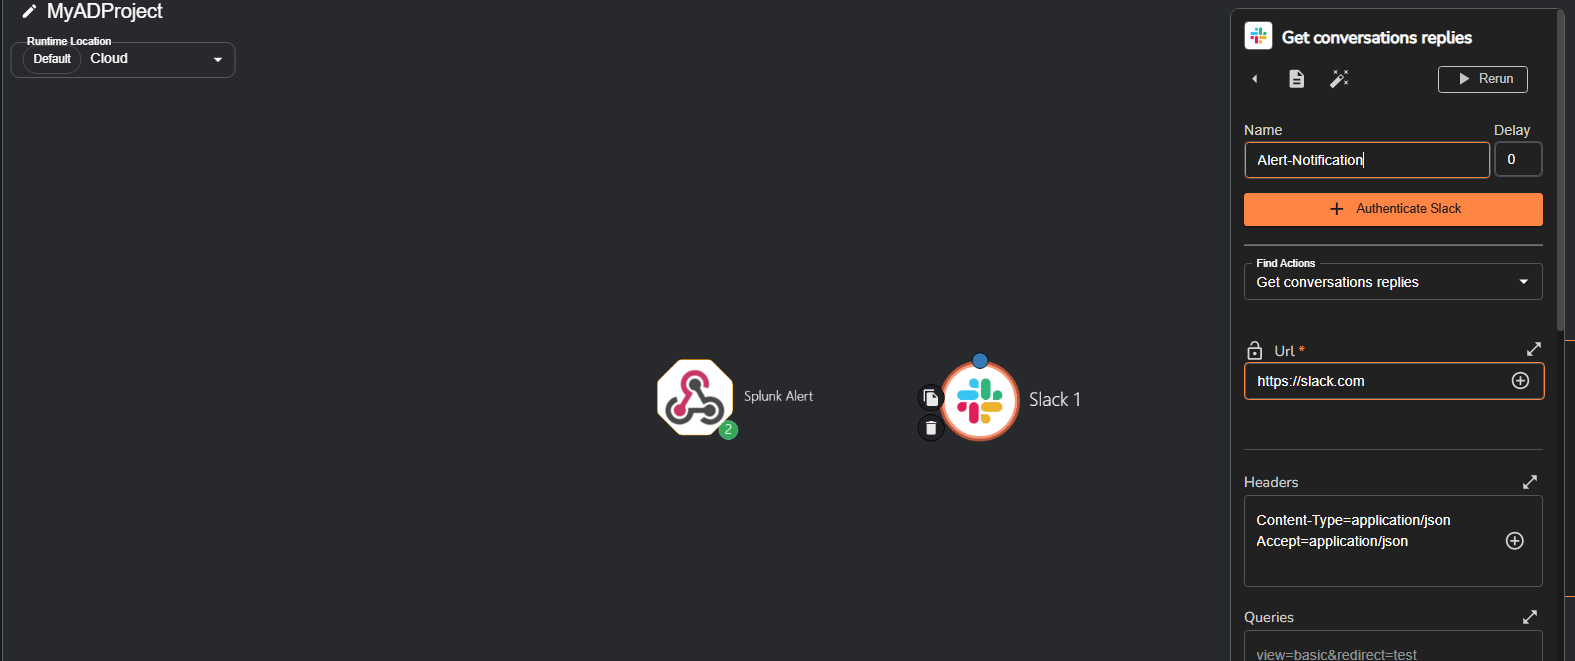
In Slack, I set up a dedicated workspace and an “alerts” channel to receive notifications. Back in Shuffle, I edited the workflow to make sure alert messages were sent to this channel, and included key details like the username, timestamp, and source IP address to give context to the SOC team. I tested the connection to make sure alerts were generated

Next, I added an email notification step to the workflow. When an alert is triggered, an email goes out to the SOC analyst asking if they want to disable the affected domain account. Their response controls the next action in the playbook.
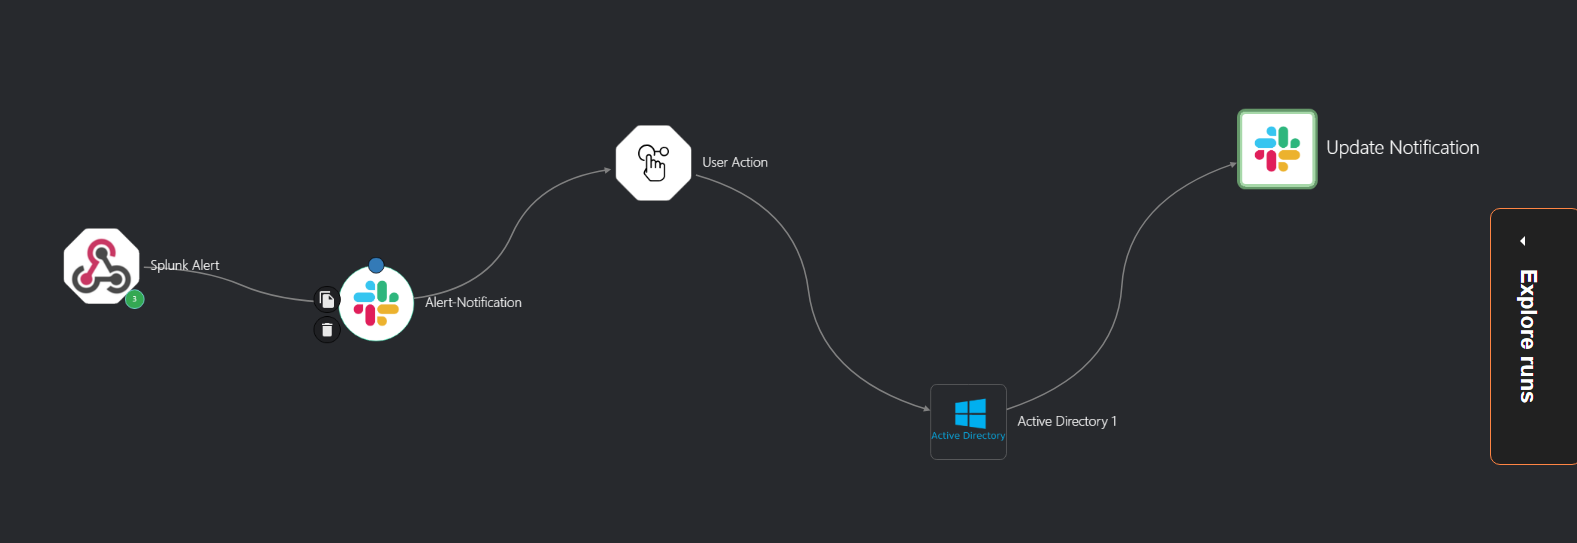
To make that action possible, I configured an Active Directory connection in Shuffle by adding the domain controller’s IP address and the necessary credentials to authenticate. Once that connection was live, I added a final step to the workflow: if the SOC analyst chooses to disable the user, Shuffle automatically sends a second Slack message confirming that the account has been disabled. If they chose no, then nothing was done.